Setup Azure Internal API Manager with Application Gateway without Custom Domains
Summary
Recently I was tasked to setup an internal Azure API Manager and expose it via a WAF Application Gateway. While there were plenty of articles on line about this topic, none of them specifically addressed how to do when you did not want to use a custom domain or purchased SSL certificates. This post walks through setting it all up in Azure using only the domains Azure issues in resource creation
Resources
These are the resources in Azure we are going to be creating
- App Service/App Service Plan (for hosting the API for API Manager)
- Network Security Group
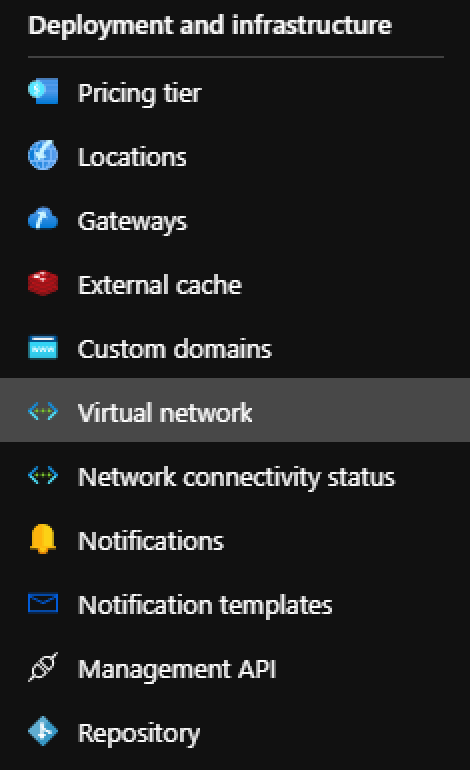
- API Manager
- Application Gateway
- Public IP Address (2)
- Virtual Machine (the jump box to interact with the API Manager)
- Virtual Network
- Application Gateway Subnet
- APIM Subnet
- VM Jumpbox Subnet
- App Service Subnet
Create the Network Security Group
- Navigate to Network Security Group
- Create a new Resource Group. This group will be used for the rest of the resources we create
- rg-contoso-api-dev-eastus
- Enter Name
- nsg-contoso-api-dev-eastus
- Click Create
- Configure the inbound and outbound rules
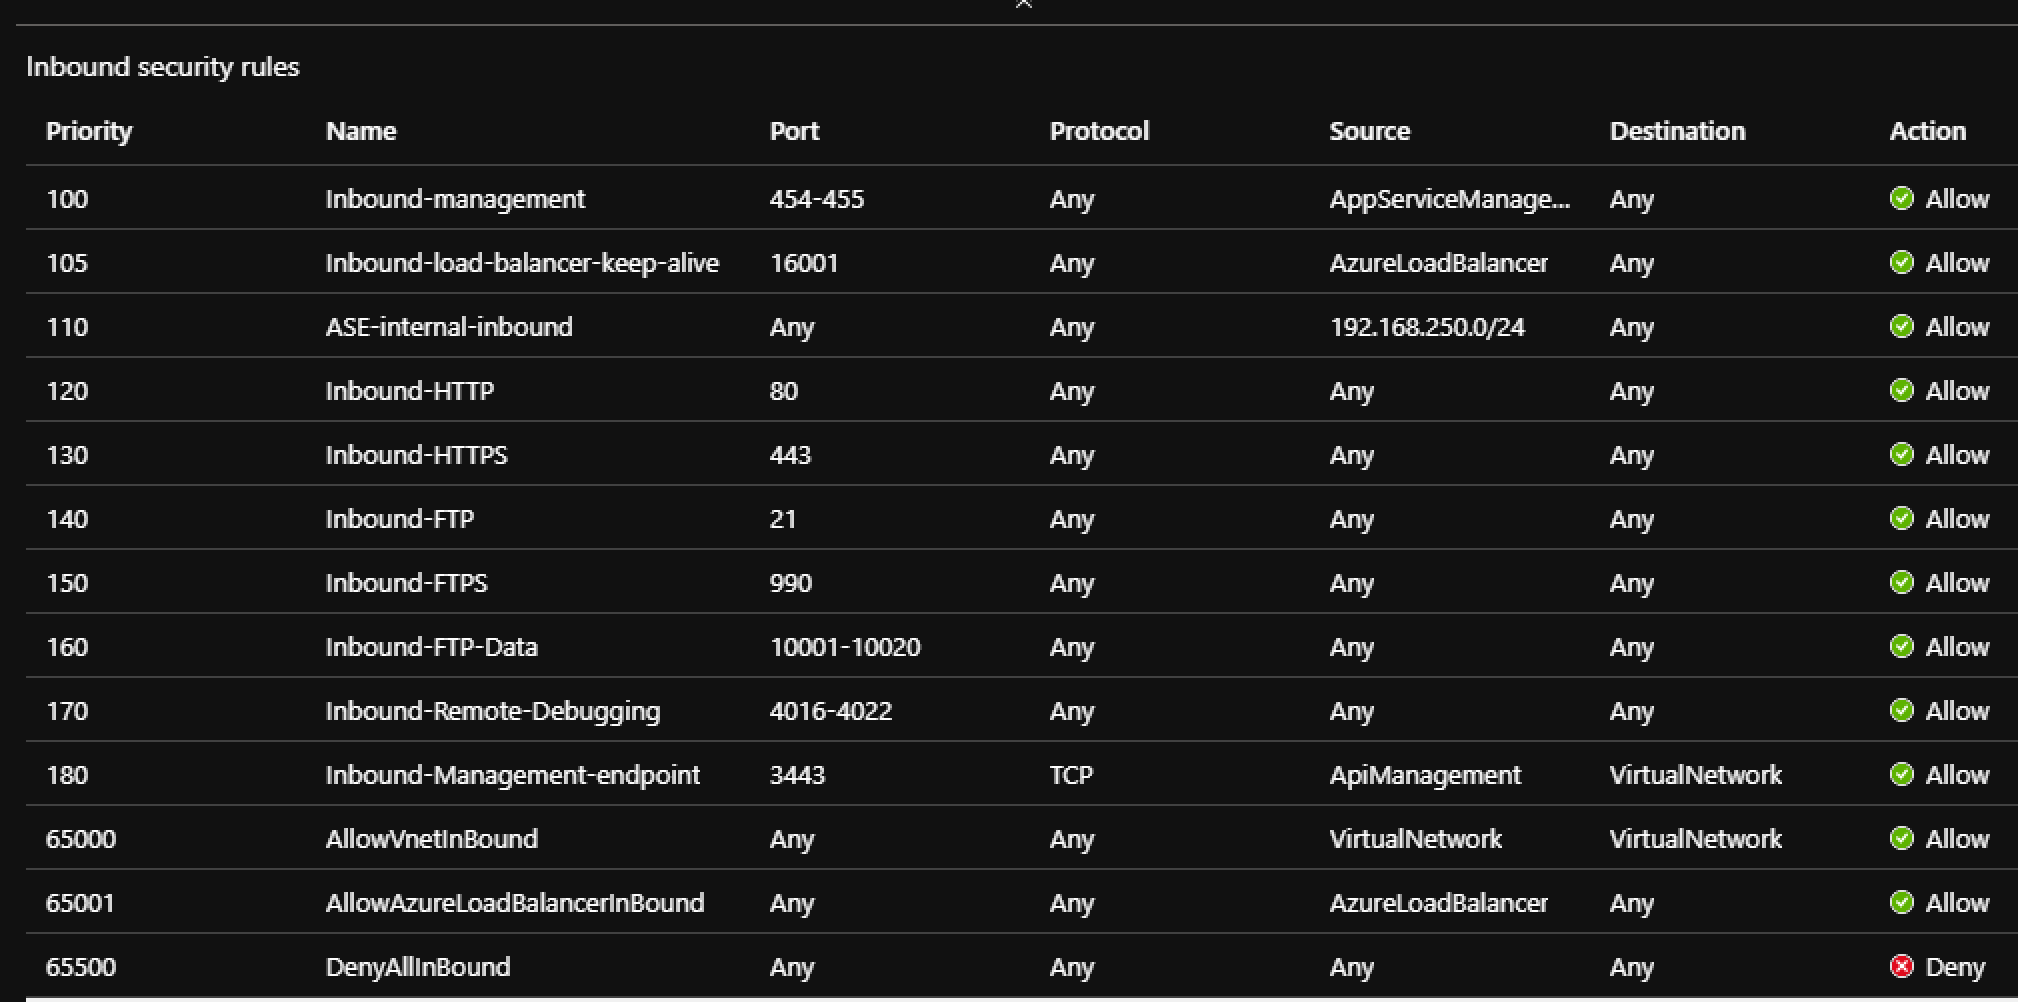
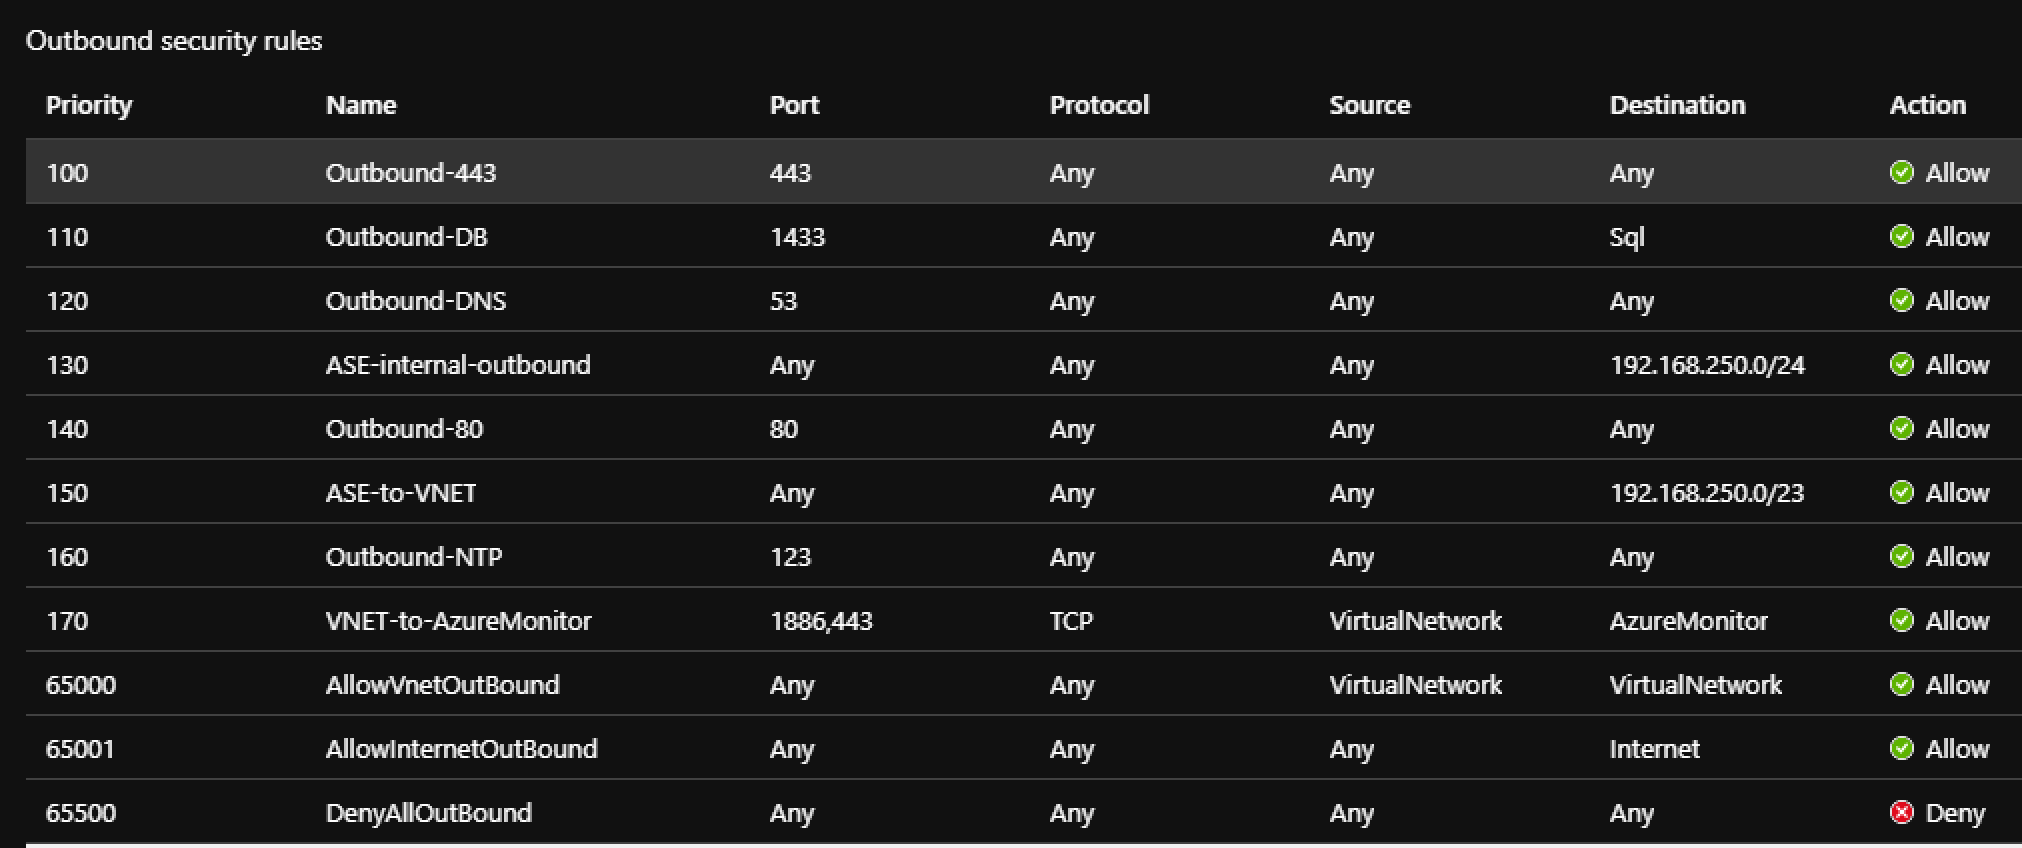
NOTE: some of these rules may not apply to your given project and circumstances.
Creating the VNET
- Navigate to Virtual Networks
- Select the Resource Group create from above
- rg-contoso-api-dev-eastus
- Enter Name for the VNET
- vnet-contoso-dev-eastus
- Select Region
- East US
- Click the IP Addresses tab
- Delete the default subnet
- Add the following subnets
- snet-contoso-gw-dev-eastus (10.0.1.0/24)
- snet-contoso-pvt-vm-dev-eastus (10.0.2.0/24)
- snet-contoso-pvt-apim-dev-eastus (10.0.3.0/24)
- snet-contoso-pvt-asp-dev-eastus (10.0.4.0/24)
- Click Review + Create
Creating the Virtual Machine
- Navigate to Windows Server 2016
- Select the Resource Group create from above
- rg-contoso-api-dev-eastus
- Enter Virtual machine name
- vm-contoso-api-jumpbox-dev-eastus
- Select Region
- East US
- Select the size of the VM you want
- Standard_B1ms
- Create a Username and Password
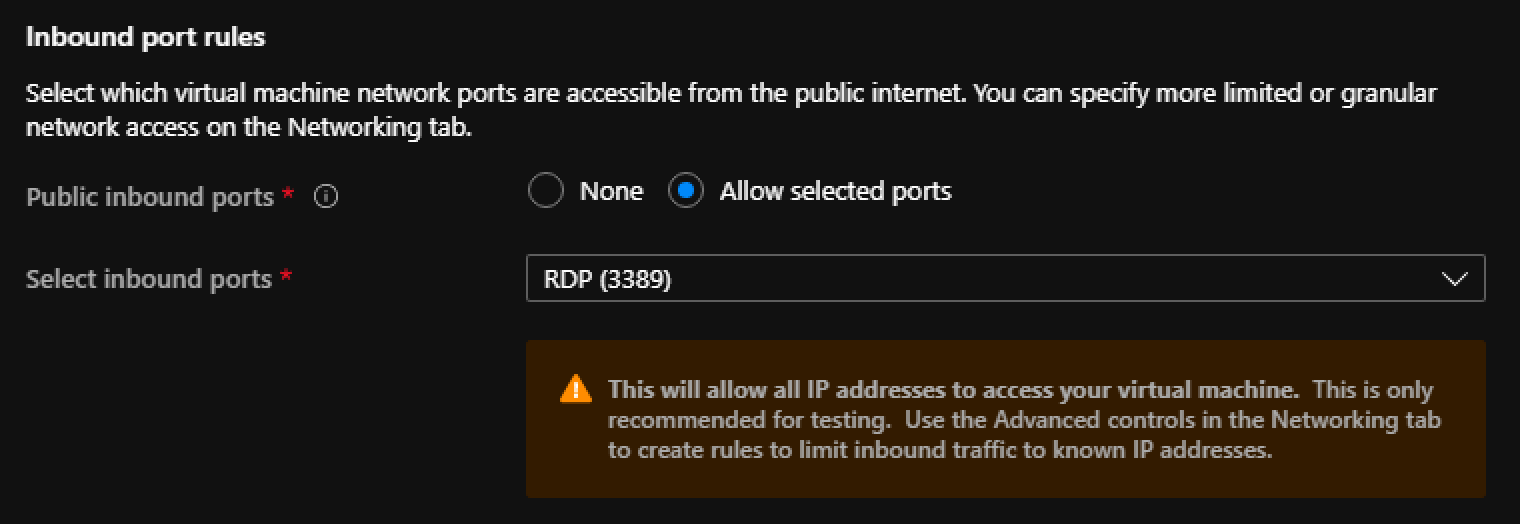
- Under Inbound port rules
- Select Allow selected ports
- Select RDP (3389) from the list
- Click on the Disks Tab
- For OS disk type select
- Standard HDD
- For OS disk type select
- Click on the Network Tab
- Select the VNET (vnet-contoso-dev-eastus) from above
- Select Subnet
- snet-contoso-pvt-vm-dev-eastus
- Create a new Public IP for the Virtual Machine
- pubip-contoso-api-jumpbox-dev-eastus
- Keep the rest of the defaults
- Under NIC network security group
- Click Advanced
- Select Create New
- vm-contoso-api-jumpbox-dev-eastus-nsg (this will be auto populated)

- Keep the rest of the default settings
- Click Review + Create
NOTE: When the VM is create a new
Lets Configure the Subnets
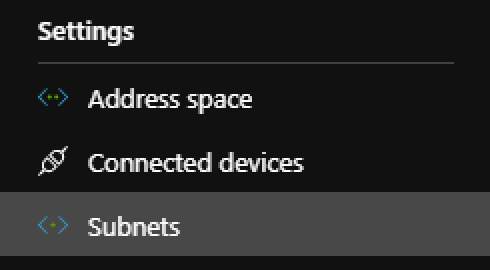
Navigate to the new VNET resource (vnet-contoso-dev-eastus) and select Subnets
Configure snet-contoso-pvt-apim-dev-eastus
- Select Subnet snet-contoso-pvt-apim-dev-eastus
- Under Network Security Group
- Select nsg-contoso-api-dev-eastus
- Under Subnet delegation
- Select Microsoft.ApiManagement/service

- Click Save
Configure snet-contoso-pvt-asp-dev-eastus
- Select Subnet snet-contoso-pvt-asp-dev-eastus
- Under Subnet delegation
- Select Microsoft.Web/serverFarms

- Click Save
Creating the API Manager
- Navigate to API Management
- Enter Name
- api.contoso
- Select the Resource Group create from above
- rg-contoso-api-dev-eastus
- Select Location (Region)
- East US
- Pricing Tier
- Select Development/Premium
- Click Create
- Once created lets join it to the VNET (vnet-contoso-dev-eastus)
- Navigate to the new APIM resource
- Locate Virtual Network
- Select Internal
- Select the Virtual Network created above
- Select Subnet snet-contoso-pvt-apim-dev-eastus
- Click Apply
Creating the App Service Plan
- Navigate to App Service Plan
- Select the Resource Group create from above
- rg-contoso-api-dev-eastus
- Enter the name
- asp.contoso.api-dev-eastus
- Select the OS you require for your API
- Select the Region
- East US
- Select your required pricing tier
- Click Review + Create
- Deploy your API to an App Service under the newly created ASP above
- Add the App service to the VNET (vnet-contoso-dev-eastus)
- Select subnet snet-contoso-pvt-asp-dev-eastus
Setting up the JumpBox
- Navigate to the API Manager resource created above
- Select Overview
- Copy the Virtual IP private IP. You will needs this below
- Select Overview
- Navigate to the Virtual Machine resource created above
- Select Connect under Settings
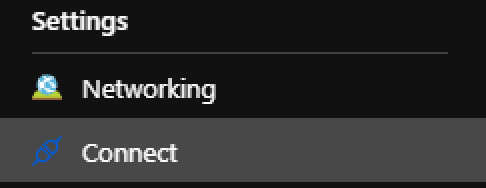
- Select RDP and click Download RDP File
- Login to VM with the UserName and Password you created while setting up the VM above
-
In windows explorer
- Open folder C:\Windows\System32\drivers\etc\
- Open the hosts file with notepad.exe
- Add the following to the bottom of the file
<APIM private IP> api.contoso.azure-api.net <APIM private IP> api.contoso.portal.azure-api.net <APIM private IP> api.contoso.developer.azure-api.net <APIM private IP> api.contoso.management.azure-api.net <APIM private IP> api.contoso.scm.azure-api.net - Testing the connection
- Open the browser and navigate to
- https://api.contoso.portal.azure-api.net/
- Signup for an account
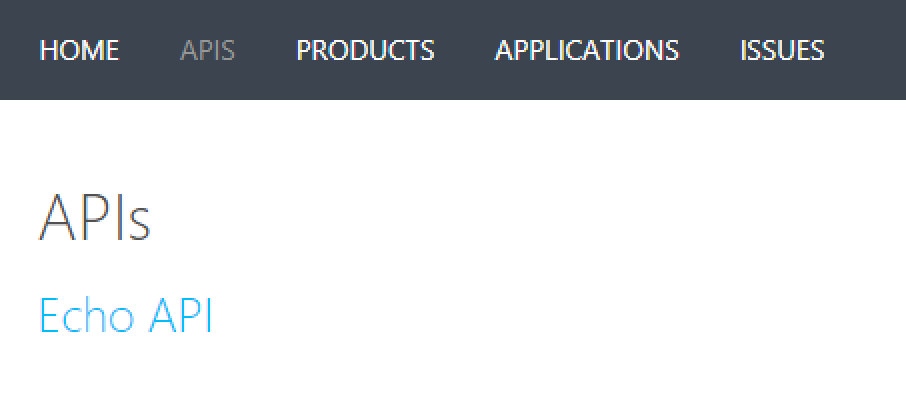
- Select APIS
- Select Echo API
- Select Retrieve resource
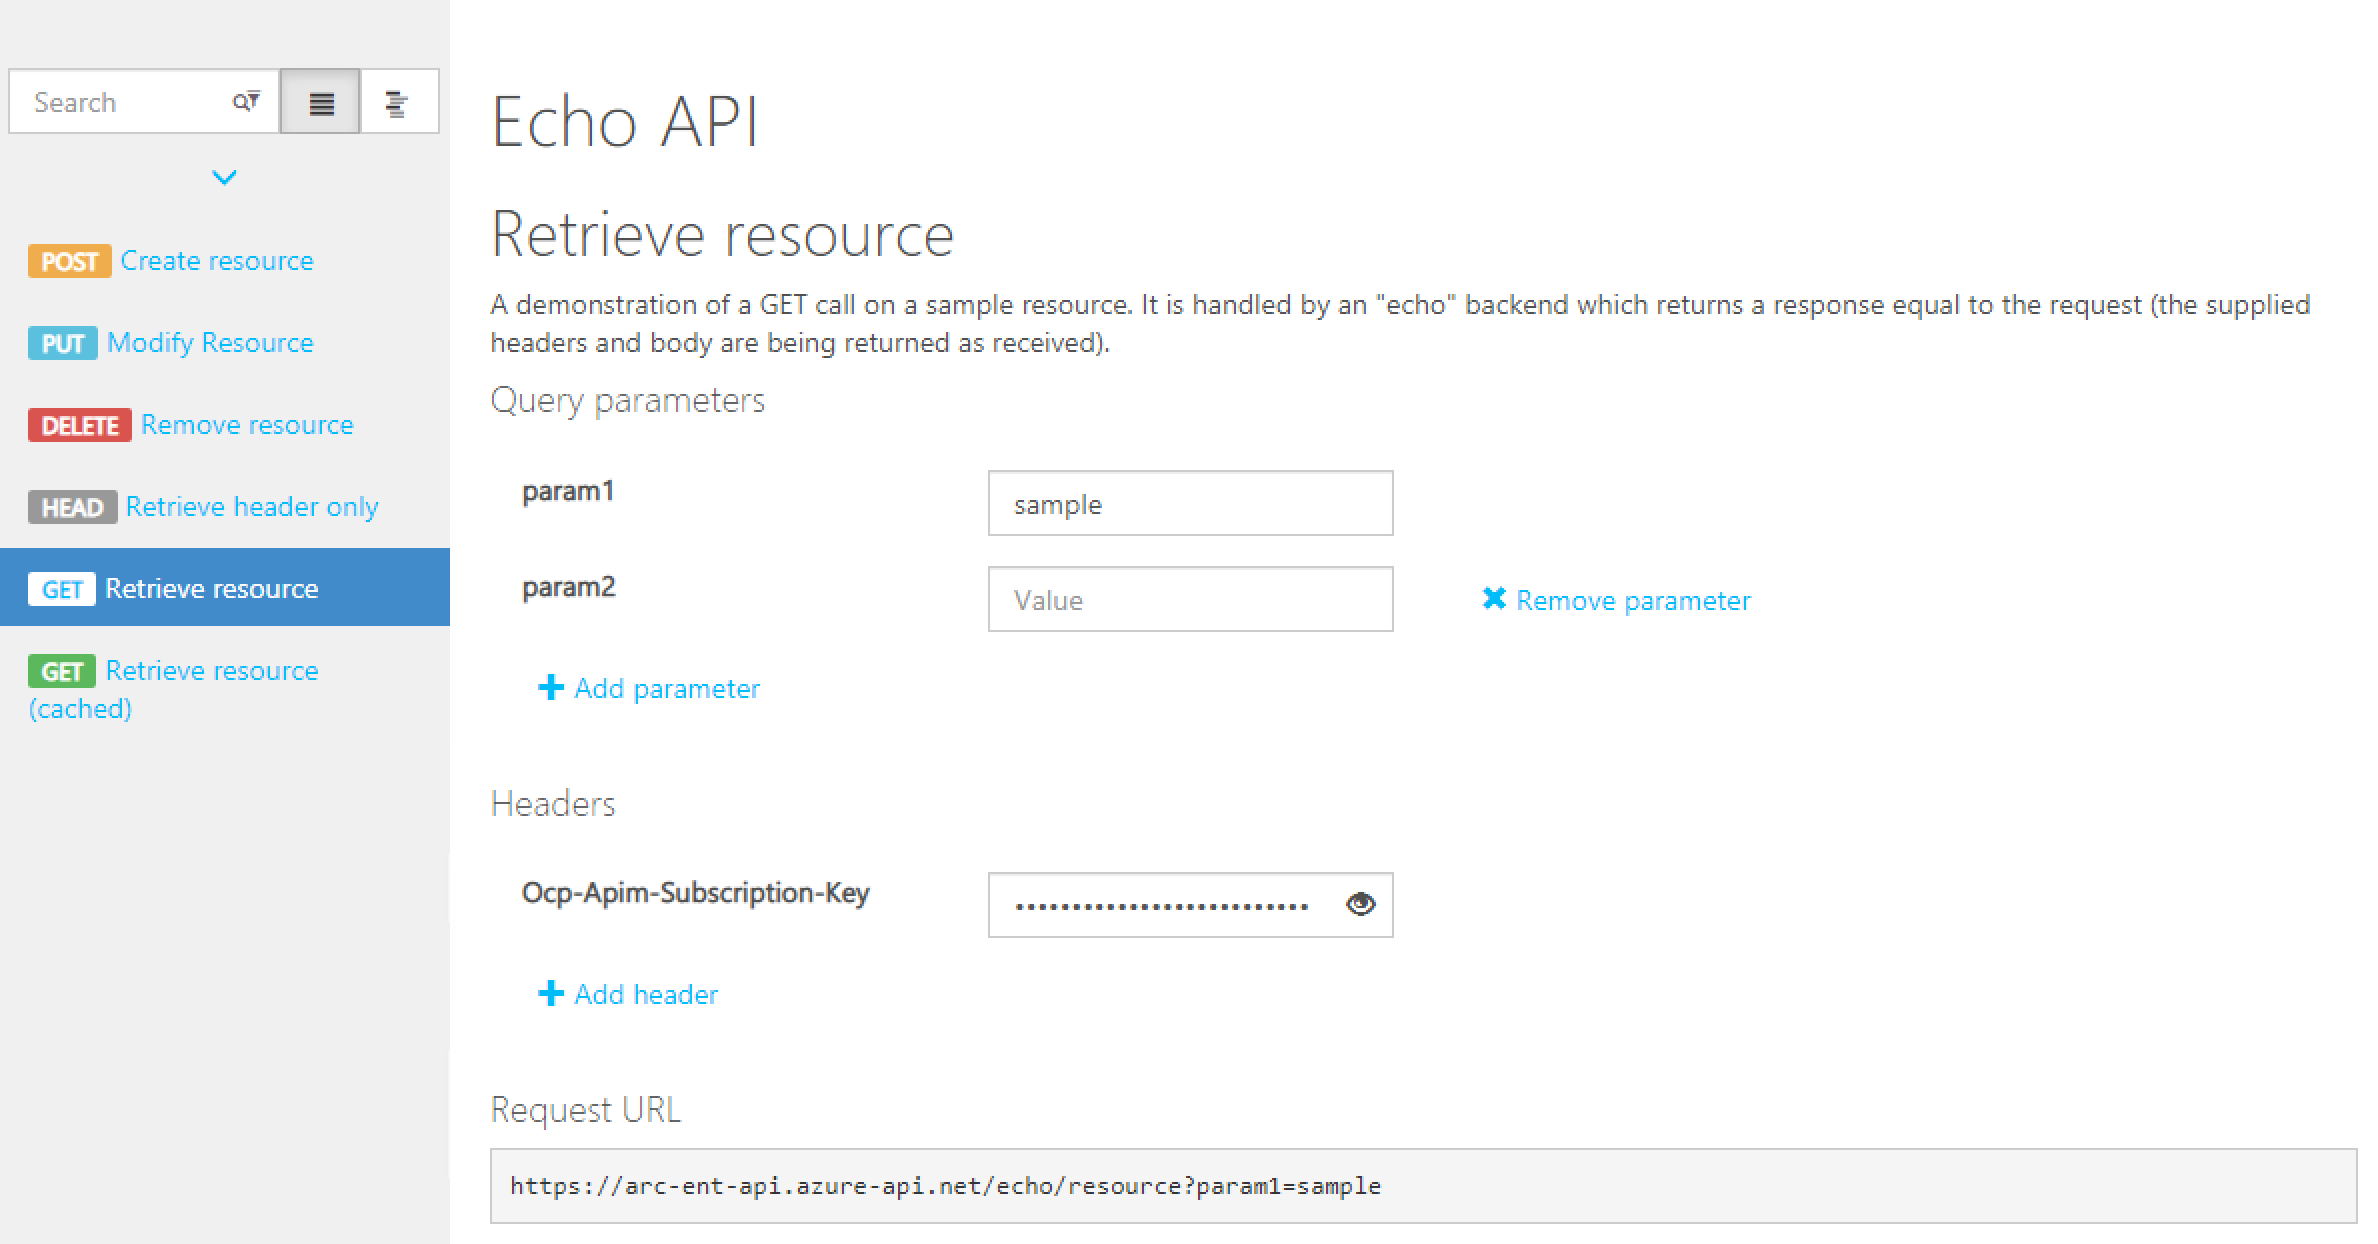
- Enter your subscription key to test the call
- If your not sure how check out Creating Subscriptions in API Manager
- Execute the call.
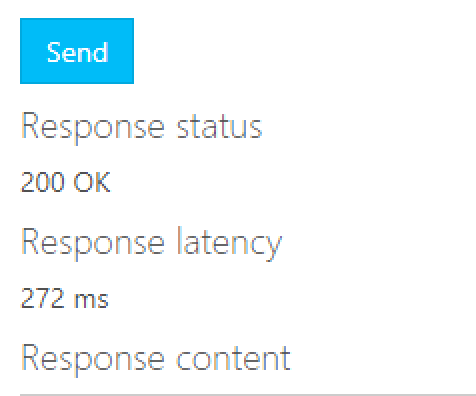
- If you received a 200 status code you have successfully configure API Manager to run internal on a VNET
- Open the browser and navigate to
Setting up Application Gateway
- Navigate to Application Gateway
- Select the Resource Group create from above
- rg-contoso-api-dev-eastus
- Enter the gateway name
- agw-contoso-api-dev-eastus
- Enter region
- East US
- Select Tier based on your needs. If possible choose V2 types
- Under Configure Virtual Network
- Select the VNET created above (vnet-contoso-dev-eastus)
- Select the subnet
- snet-contoso-gw-dev-eastus
- Click Frontends
- Select Public for address type

- Create a new public IP address
- ip-contoso-gw-dev-eastus
- Select Public for address type
- Click Backends
- Select Add a backend pool
- Enter name
- backend-asp-api-dev-eastus
- Add Target
- Target type: IP Address or FQDN
- Target: api.contoso.azure-api.net
- Enter name
- Select Add a backend pool
- Click Configuration
- Select Add a routing rule
- Enter Name
- rule-https-backend-asp-api-dev-eastus
- Under the Listeners Tab
- Enter Listener Name
- https-listener
- Enter Frontend IP
- Select the IP created from the earlier step
- Protocol
- Select HTTPS
- Http Settings
- Lets get the certificate we need. For this we can use a self-signed certificate to secure the incoming requests
- Open a Powershell Command prompt
New-SelfSignedCertificate -certstorelocation cert:\localmachine\my -dnsname api.contoso.com

$pwd = ConvertTo-SecureString -String Password$ -Force -AsPlainText

Export-PfxCertificate -cert cert:\localMachine\my\<COPY FROM OUTPUT ABOVE> -FilePath c:\api-contoso-gw-cert.pfx -Password $pwd
- Upload the created certificate
- Enter a cert name
- self-cert-contoso-api-gw
- Enter the password used from Powershell
- Click Add
- Under the Backend targets
- Select Target type Backend pool
- Select the backend pool created above
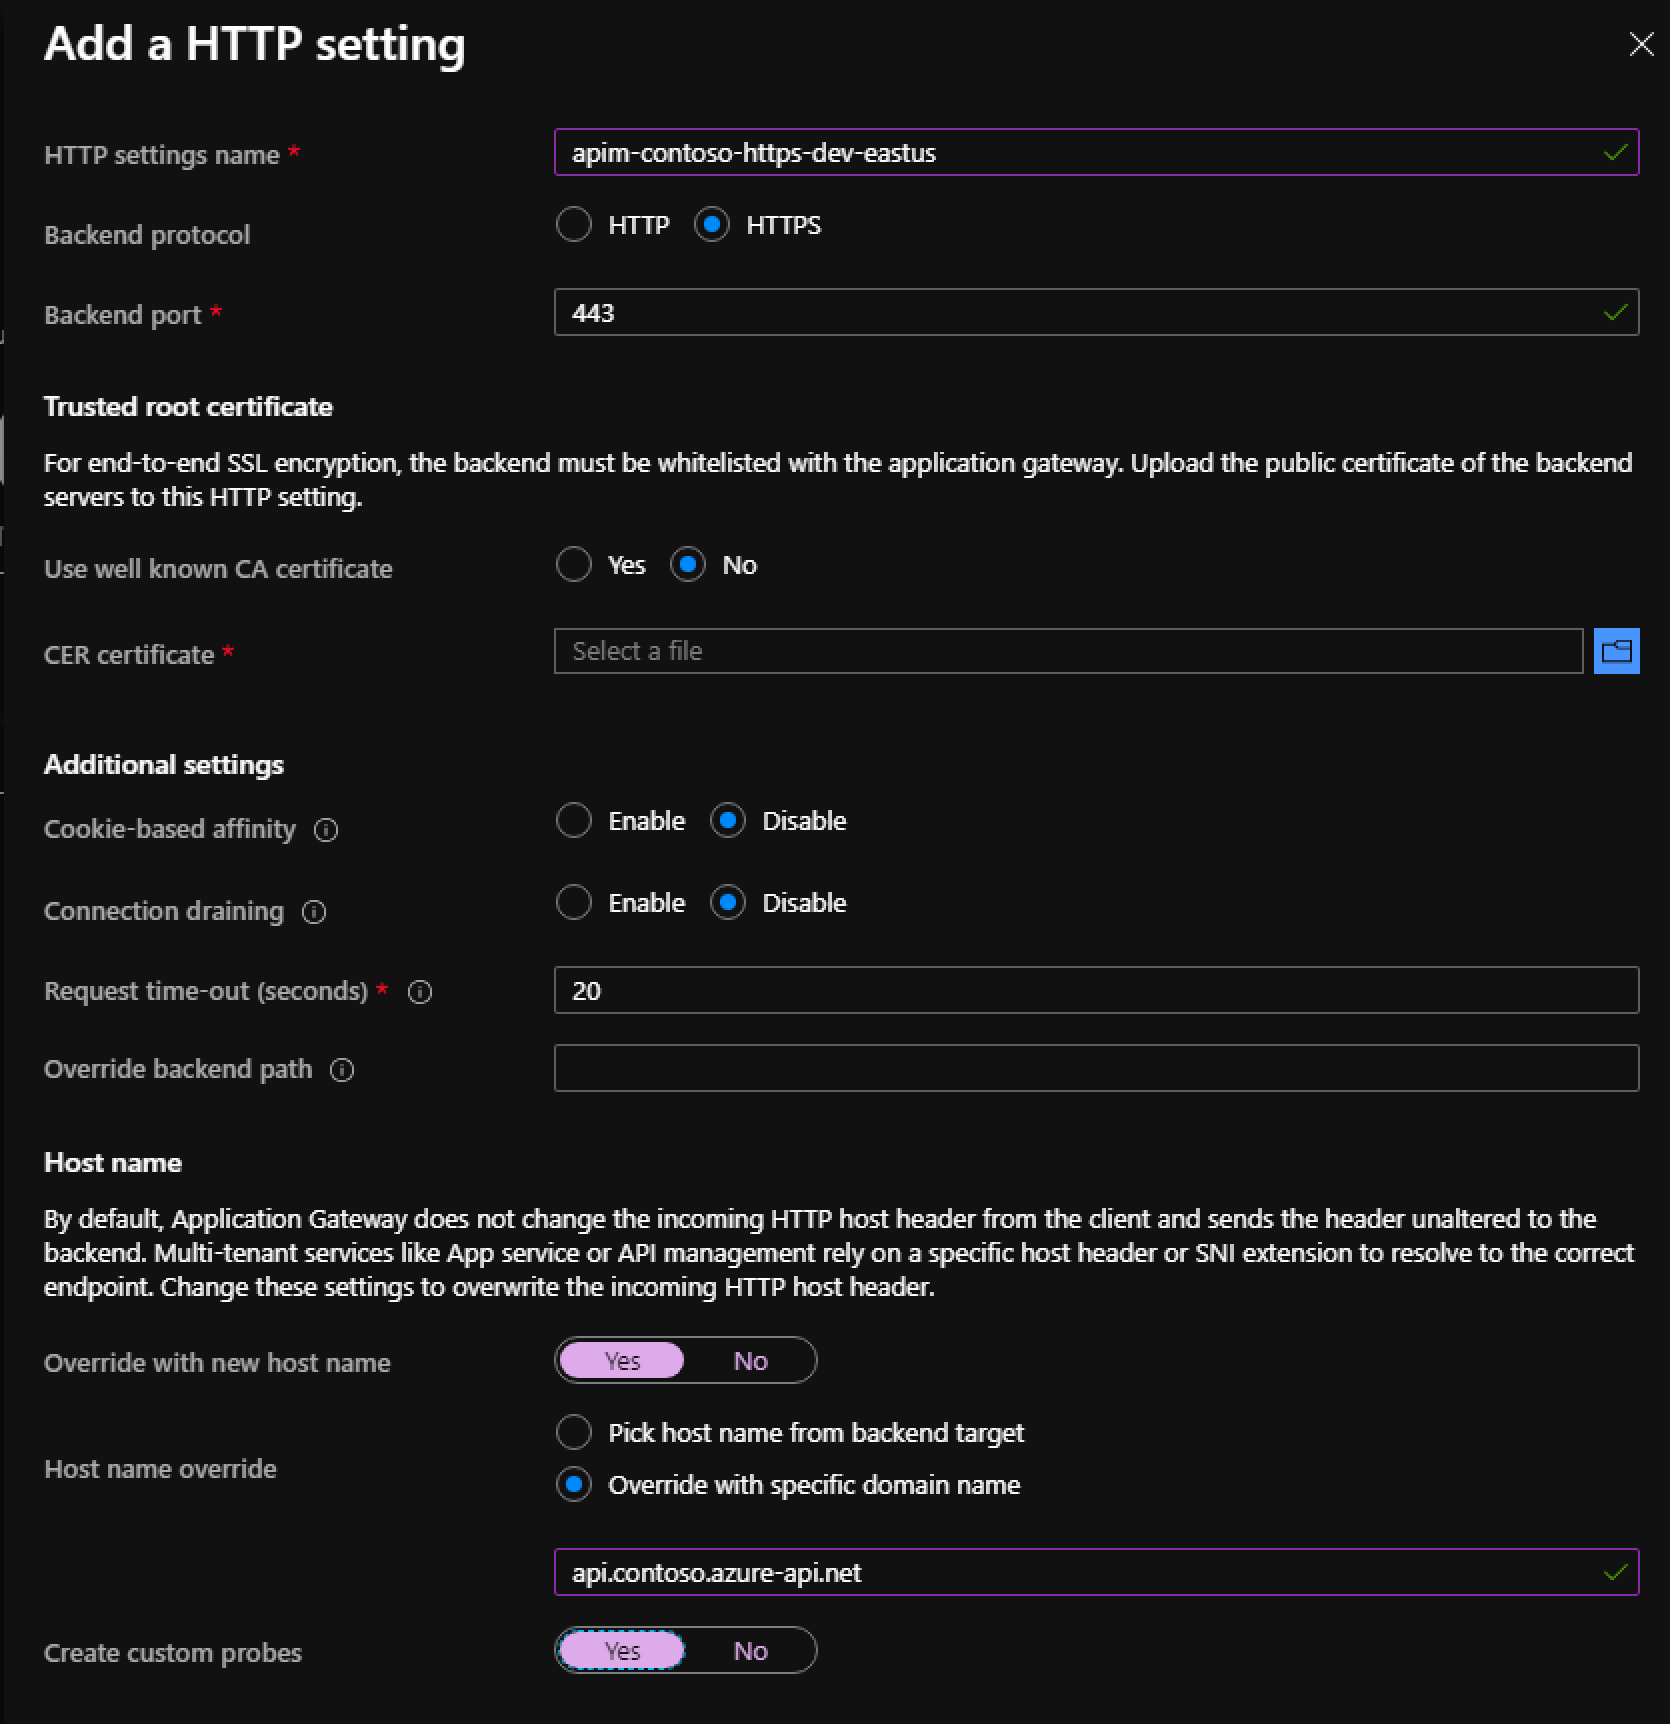
- Select Add new for Http setting
- Enter HTTP setting name
- apim-contoso-https-dev-eastus
- Backend protocol
- HTTPS
- Use well known CA certificate
- NO
- Getting the .cer to upload
- Remote into the Jumpbox
- Open the browser and navigate to
- https://api.contoso.portal.azure-api.net/
- Click on the secure connection icon in the browser. Select Certificate
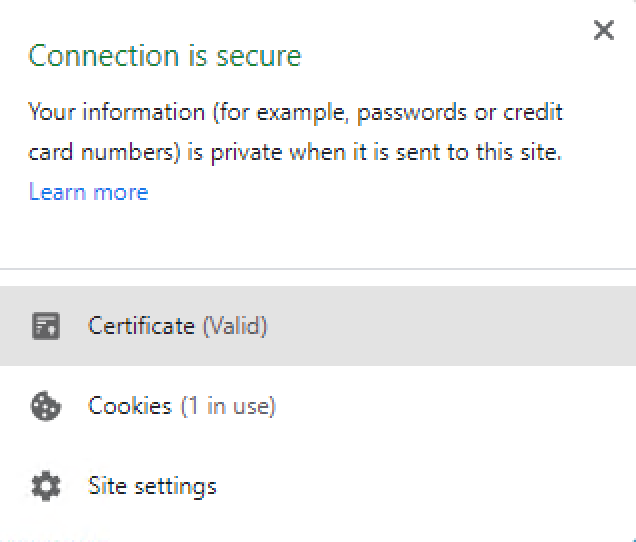
- Click details tab and Copy to File

- In the export wizard. The exported file format should be Base-64-encoded X.509 (.VER)
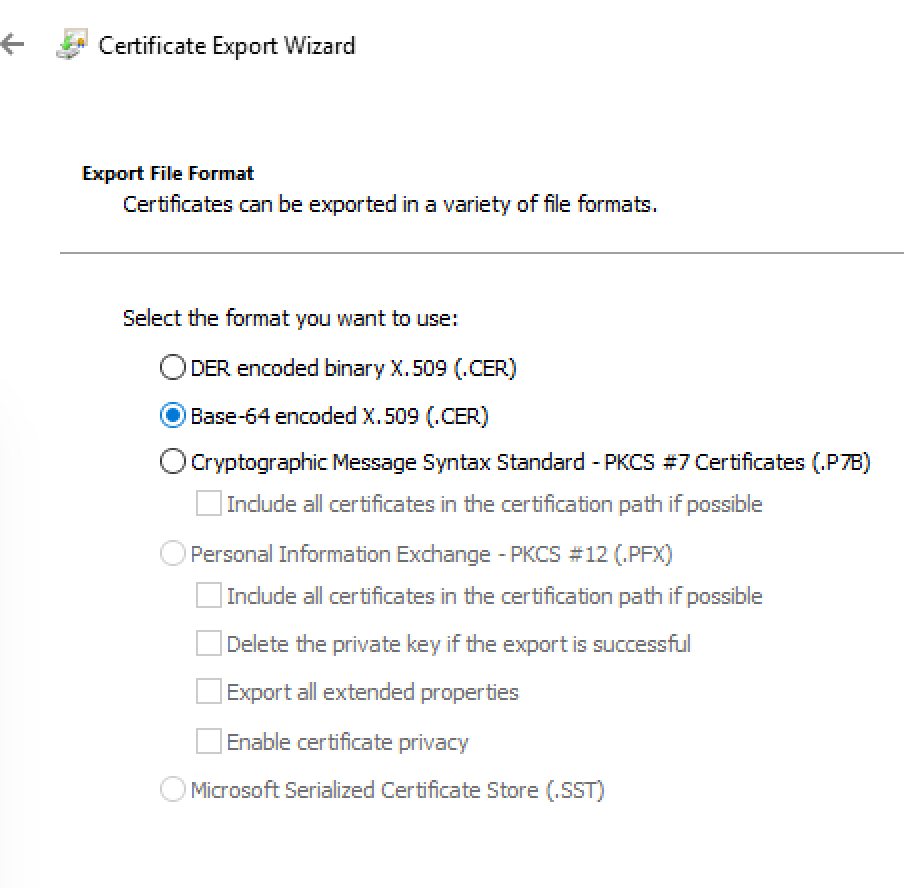
- Enter a file name
- api-contoso-dev-eastus.cer
- Copy this file from the Jumpbox the where you are creating the Application Gateway above
- Override with new host name
- YES
- Host name override
- Override with specific domain name
- api.contoso.azure-api.net
- Click Add
- In the export wizard. The exported file format should be Base-64-encoded X.509 (.VER)
- Click Add
- Click Review + Create
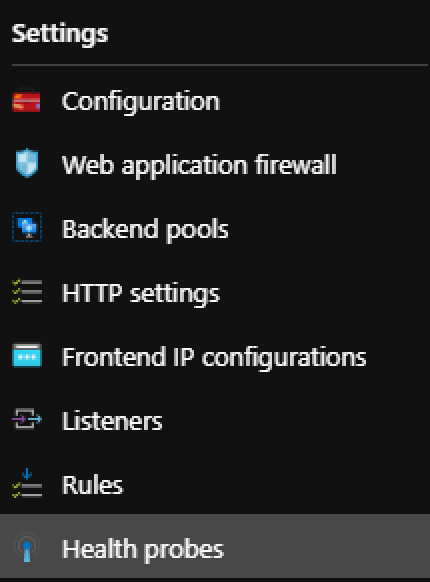
- Configuring the Custom health probe
- Goto the Application Resource created above (agw-contoso-api-dev-eastus)
- Select Health probes
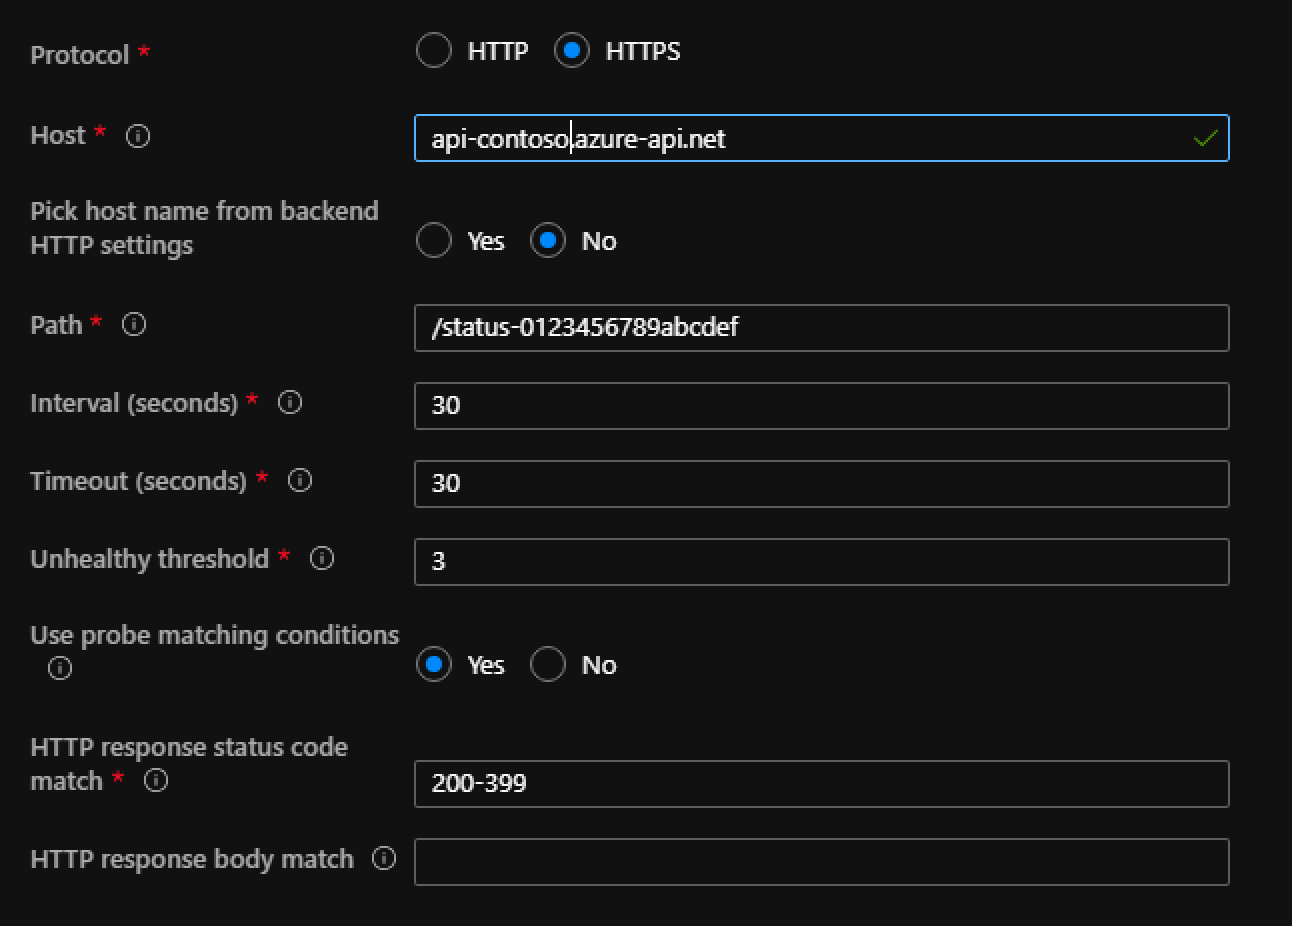
- A custom probe should have been created but it needs some tweaking to get it to validate against API Manager
- Host
- api-contoso.azure-api.net
- Pick host name from backend HTTP settings
- No
- Path
- /status-0123456789abcdef
- This is APIM static health check endpoint on any instance
- Use probe matching conditions
- Yes
- Http status code match
- 200-399
- Verify Application Gateway and Backend pool can connect
- Select Backend health
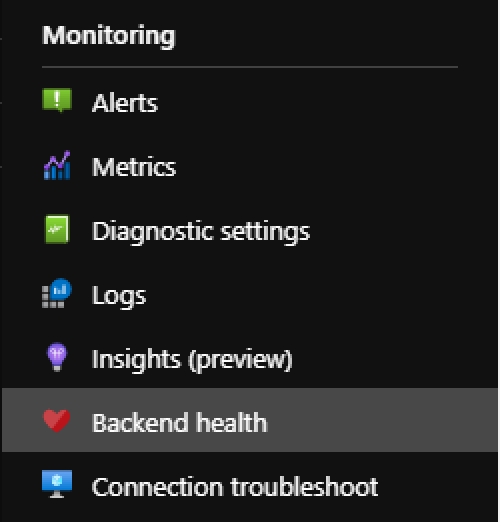
- 200-399
- If all checks out and everything is configured correctly should get a healthy status

- Enter Listener Name
Testing An API Call
To test everything is connected run the following cURL command
curl --location --request GET 'https://<APPLICATION GATEWAY PUBLIC IP>/echo/resource?param1=sample' \
--header 'Ocp-Apim-Subscription-Key: <YOUR APIM SUBSCRIPTION KEY>'
Final Thoughts
Hopefully this has helped get everything configured and up and running.
Resources
https://docs.microsoft.com/en-us/azure/api-management/api-management-using-with-internal-vnet
http://thewindowsupdate.com/2020/03/20/integrating-api-management-with-app-gateway/